20260624 June Artist Statement - War Rig
The merry month of June#
As in previous months, the June painting theme was “veterans,” or expanded upon, “battle damange, weathering, or maybe an ork that found a new shiny on the battlefield.”
I initially had a couple of ideas for this - some well worn terrain, or perhaps my “C-Scale” extra lorge Timberwolf/Mad Cat Battletech miniature. After all, I already had some terrain with battle damange on it, primed and ready to go.
Ultimately I decided on something a little more involved. Something a little more… Gasland-y.
Before and way before#
The Gasland-y thing I landed on was creating a War Rig (for Gaslands, if that wasn’t clear). Gaslands is one of those games where, while model agnostic, I find is very much a blank slate for whatever you want to create. And for me, that’s generally something rusty, broken, and barely functional in the desert wastelands of Future Earth (some of which you can see here.
What better canvas for a bunch of battle damage?
I started with this Hot Wheels tanker - it’s surprisingly hard to find 18-wheelers from Hot Wheels.
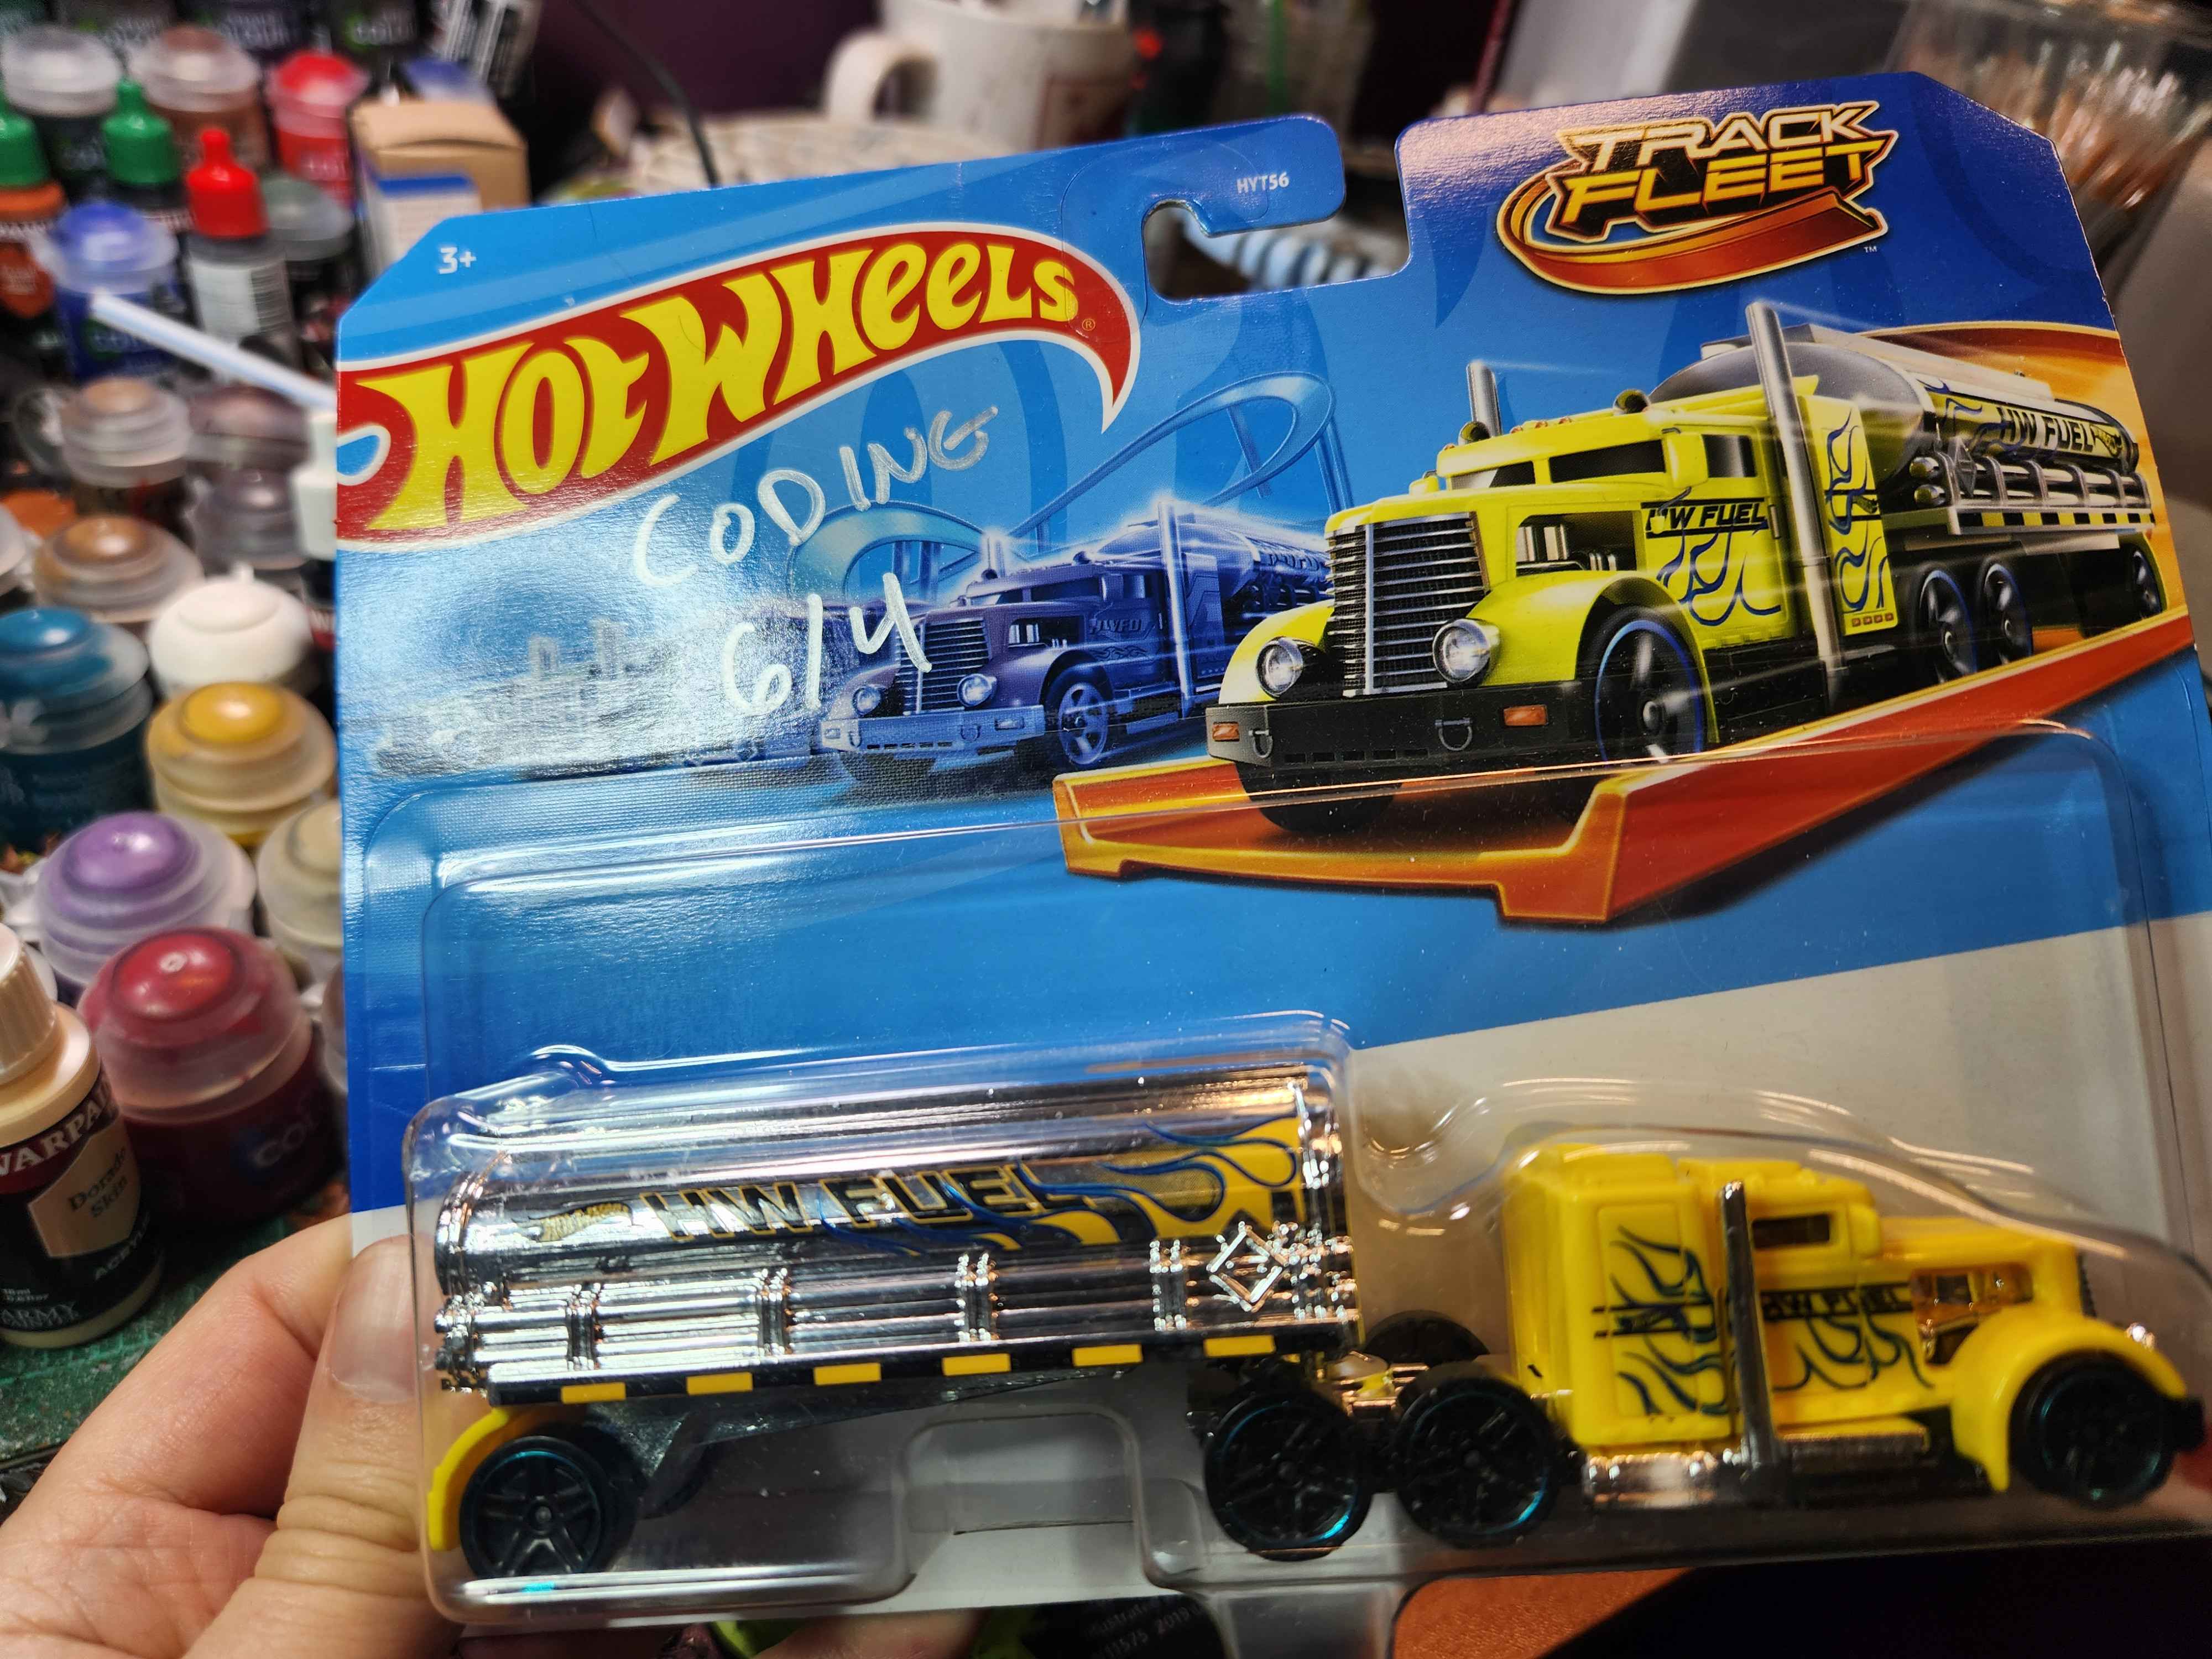 Set me back a cool buck fifty
So as I’ll get to, I (for whatever reason) decided to film the whole project from start to finish in order to turn it into a timelapse video. Because of this, I didn’t take a ton of in-progress photos, so I may be pulling some stills from the videos.
Okay, it’s actually not that deep - since Gaslands conversions involve so much kitbashing and the end result can look vastly different than the start, I wanted to show the progress of getting to Point B from Point A.
Build em up, break em down#
I didn’t really start out with much of a plan. “Battle damange” and “weathering” were pretty broad ideas, and easy to incorporate no matter the kits that get bashed. So really I started by poking around through my bits box - a couple protane takes here, a snowplow scoop there. The engine block was the first thing I added, the iconic look it gives it screams Mad Max/Twisted Metal to me.
One thing I do often do with Gaslands conversions I stayed away from in this case was actually cracking the kit open. It’s common (and I’ve done it) to drill out the pins in the bottom of a Hot Wheels to be able to split the layers apart and remove the windows for a more “realistic” post apoc look. I opted not to, as I didn’t want to break anything by accident trying to rip it apart (or shove it all back together) and I figured the windows in this case were too small to be worth all the effort. I also find it a pain in the ass to drill out that bottom pin. I’m always worried I’m going to drill straight through my hand instead.
The zip ties and the coffee stirers were kind of a spur of the moment decision and they turned out much better than I expected. It worked out great that they were the perfect size to fit on the rails on the top of the tanker. I liked the texture of the zip ties and wanted an easy way to apply them to the tanker in a uniform way.
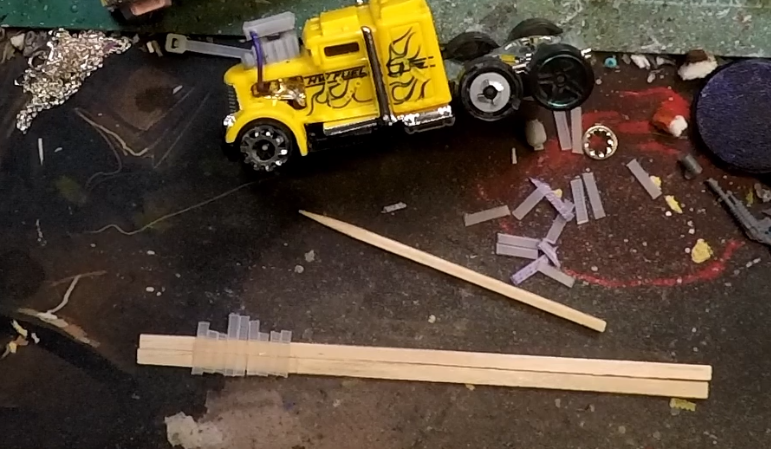
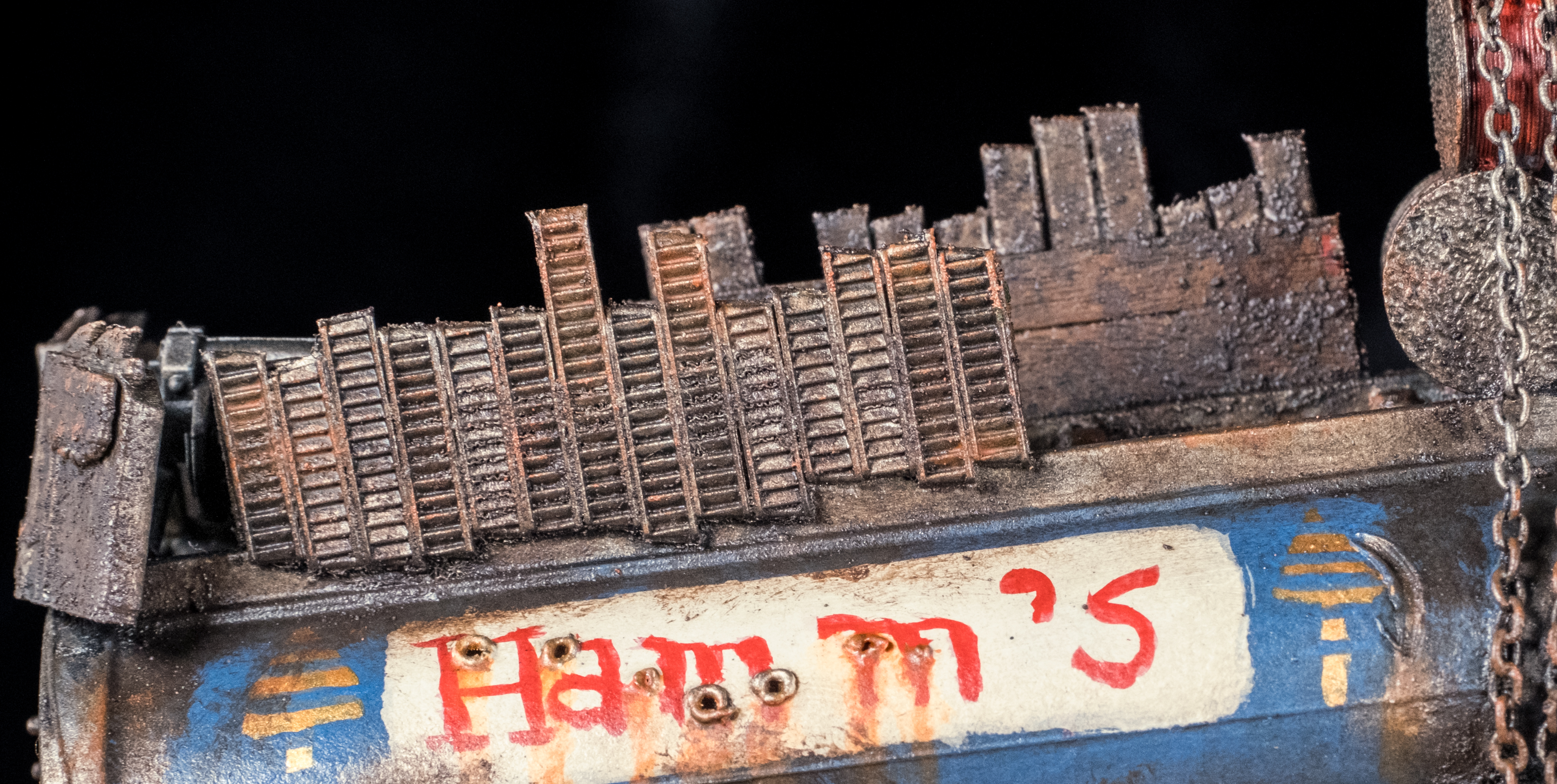
I didn’t want to overload the build with guns, but I wanted something on both the cab and the tanker, as they can get seperated in gameplay. The scale of the grenade launcher on the back might be a bit off, but it still feels appropriately heavy for the truck.
The wheel covers are one thing I love to add beacuse I feel like they give the cars so much detail. I had to stop myself from adding something to every wheel on the kit.
From the beginning I knew I wanted to include the necklace as a chain somehow, since I haven’t gotten a good chance to use it in a kitbash yet. Really the only reason the barrels are there are to give the chain something to hold in place.
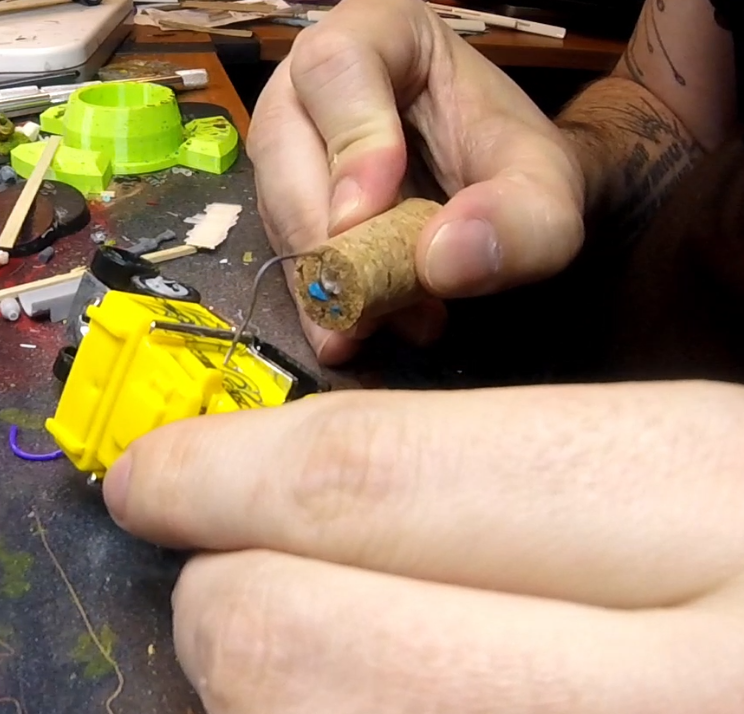
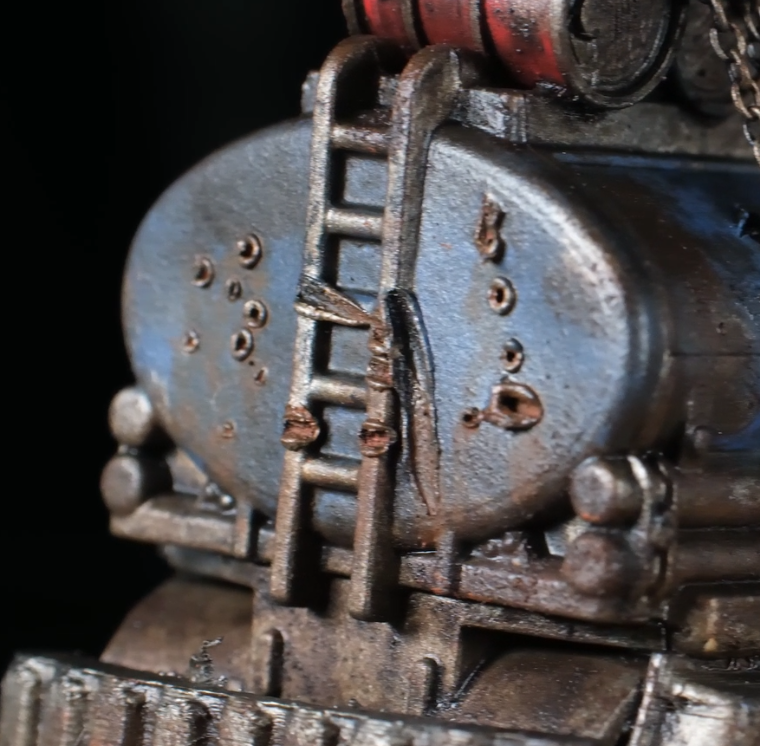
The bullet holes and other battle damange meant I got to bring out my favorite tool again, Trogdor. There’s a not insignificant number of bullet holes on the back of the tanker, as I tried to think of where this thing would most likely get shot at.
Paint it black#
I didn’t initially start out with the idea of painting this tanker up as a Hamm’s truck. That idea came to me when I was asking for color theory advice - I wanted to try the oil pin wash effect with rust colors, so I wanted a color to make those pop the most. “Desaturated blue,” was the answer. And you know what else is desaturated blue? Hamm’s.
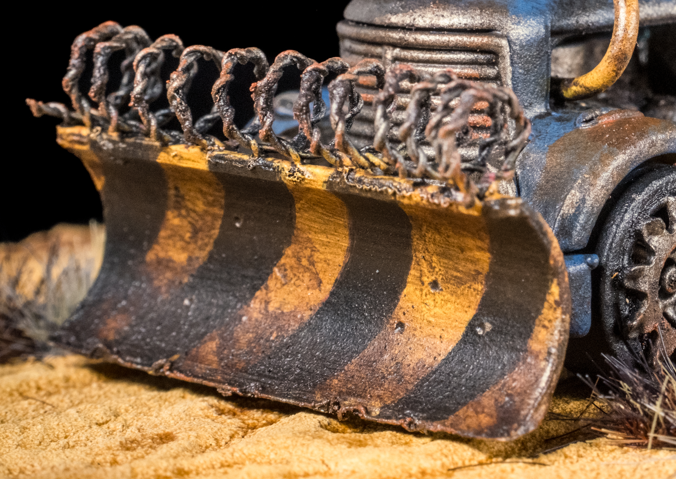
This blue is/was a bit of a pain in the ass, having pretty poor coverage. Once it was on there it looked alright though. The hazard stripes in the scoop is another spur of the moment decision. When I was gluing the scoop on, I was visualizing it being a cement grey. Initially I tried making the hazards meet in the middle in an inverse V, but that came out poorly and I figured it was easier to fix it by making them all go in the same direction. They’re not my smoothest hazards, but I think they turned out alright after the weathering.
Speaking of Hamm’s (I’m always speaking of Hamm’s), once I had the idea for the branded tanker I wanted to do the logo freehand, you know, to work on my freehand and it actually took 2 (or three, depending on who you ask) attempts.
I feel like the first iteration of the Hamm’s logo text was actually my best. A combination of good sizing and letter recreation, I had made the fatal mistake of painting the red letters straight over the blue base, making for 1) hard to read text and b) not a very faithful recreation of the logo.
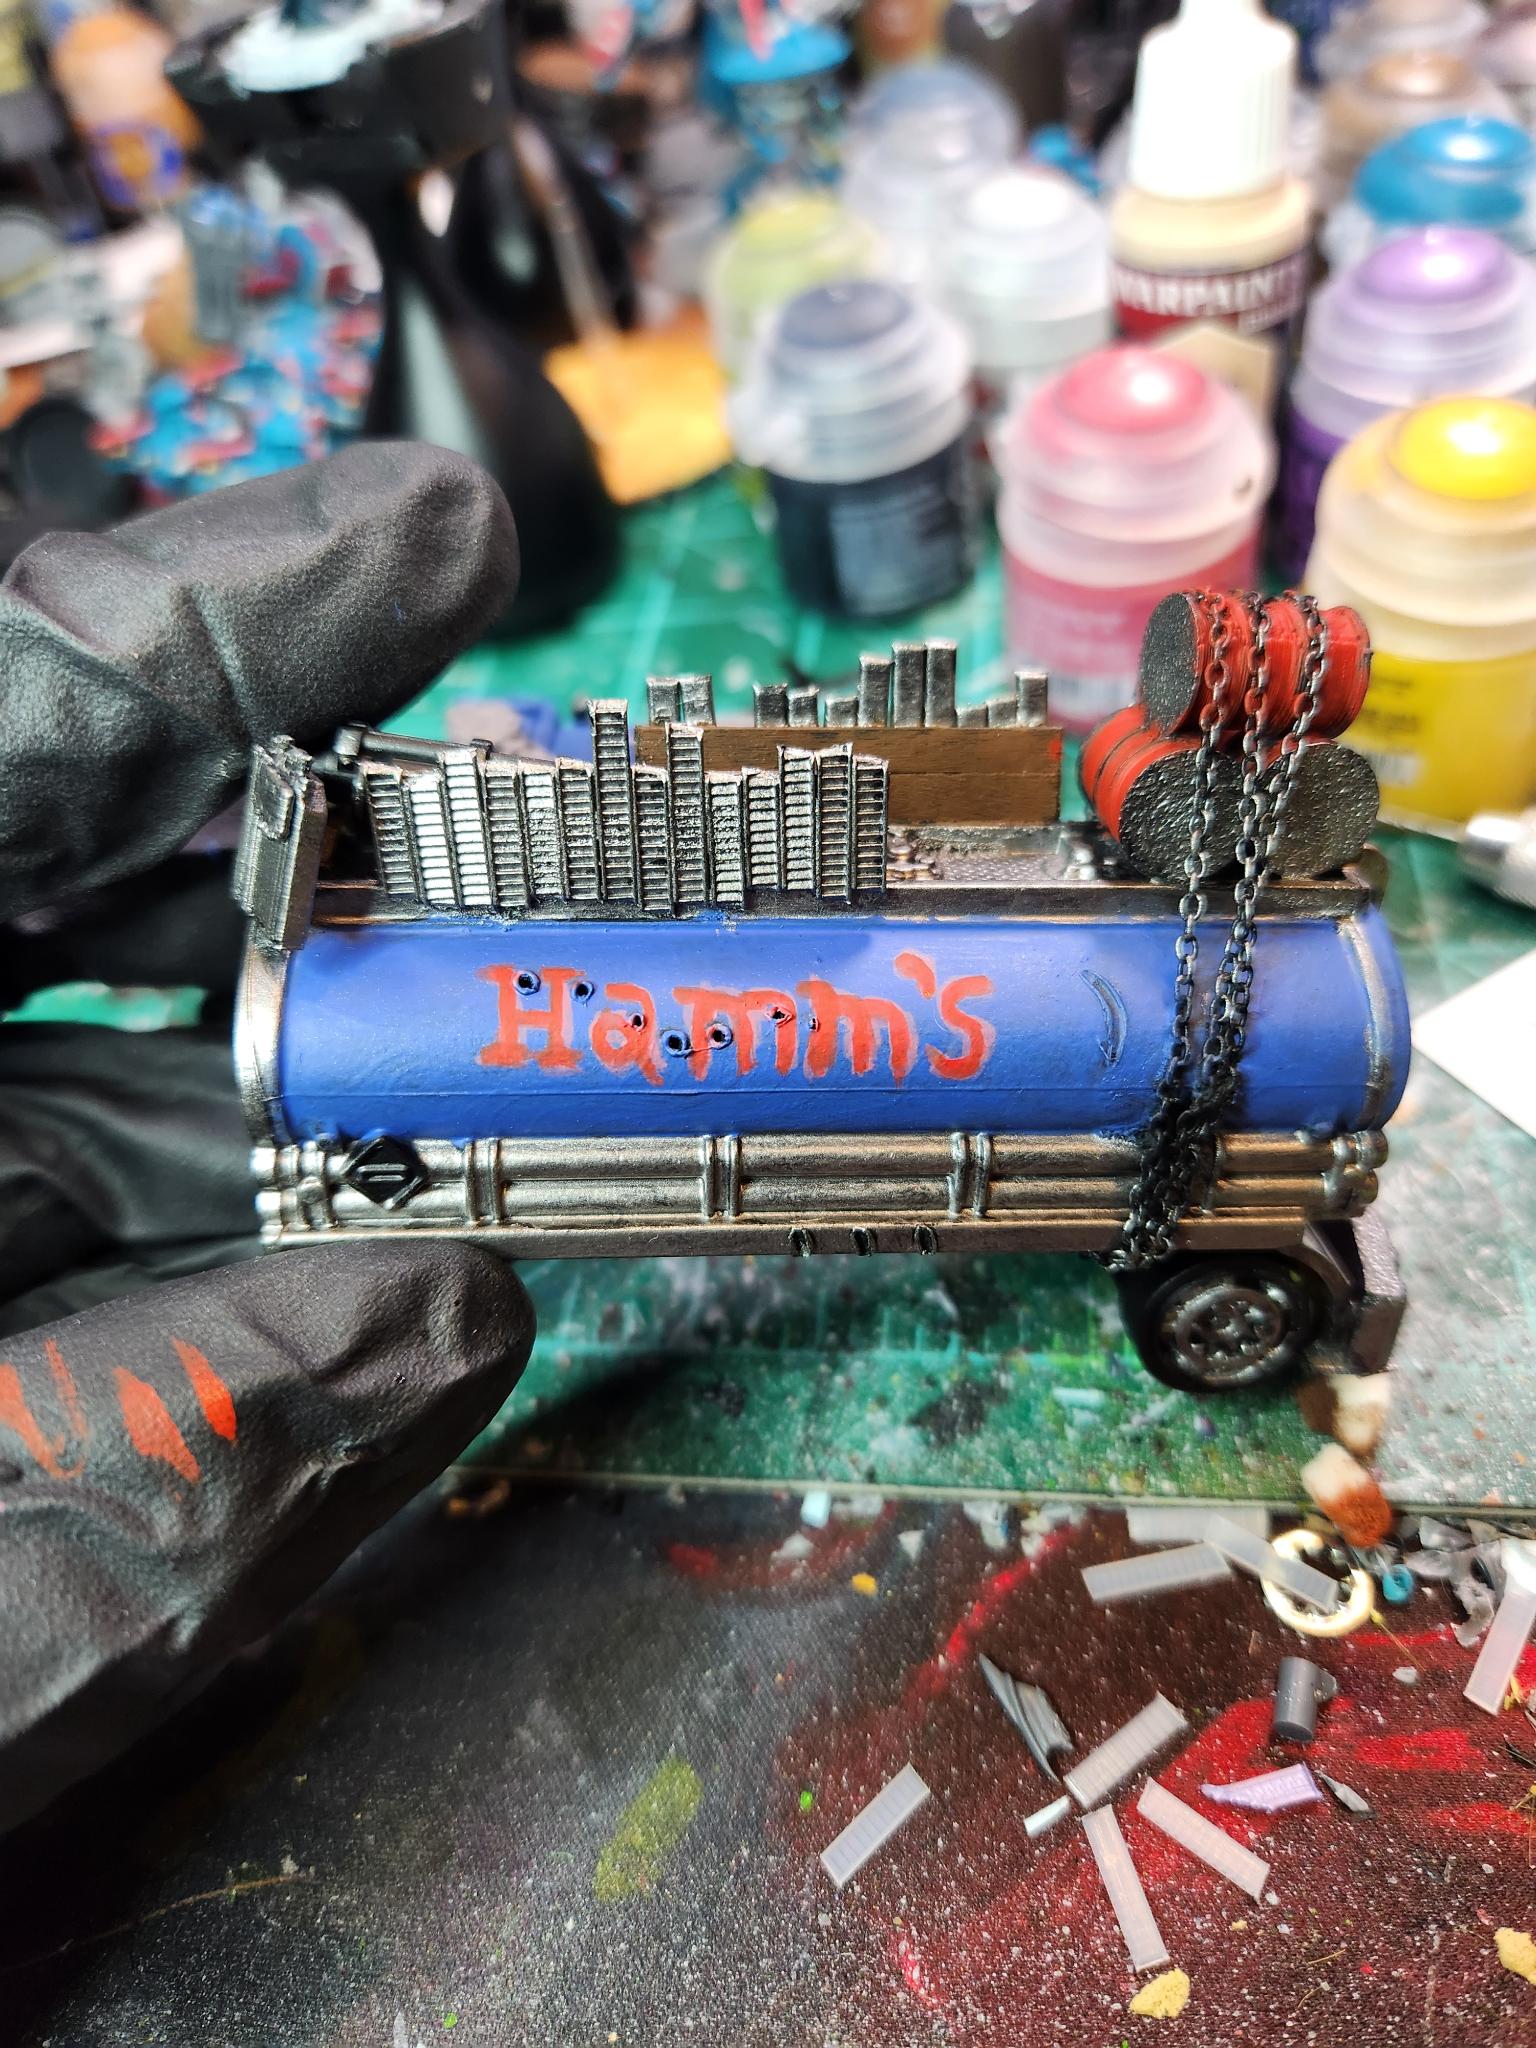
(The pink layer here was to help the red pop over the blue and was inteded to be cleaned up afterwards. It’s not some weird drop shadow effect.)
Thought I had a rough time with the next two attempts, and ultimately I opted for a “great is the downfall of good” mentally to the result I went with. I do think the white boxing for the logo makes it feel a lot more in line with the actual can logo. I even tried to fit in the golden pine trees on the sides.
As I said, the logo was there for freehand practice. And doing it 3 times certainly gave me some practice. Spacing and sizing became my biggest issues in recreating the logo text multiple times, especially after giving myself a literal box to fit inside. While I might feel that Version 1 may have been better than Version 3, getting the reps in is still useful and important.
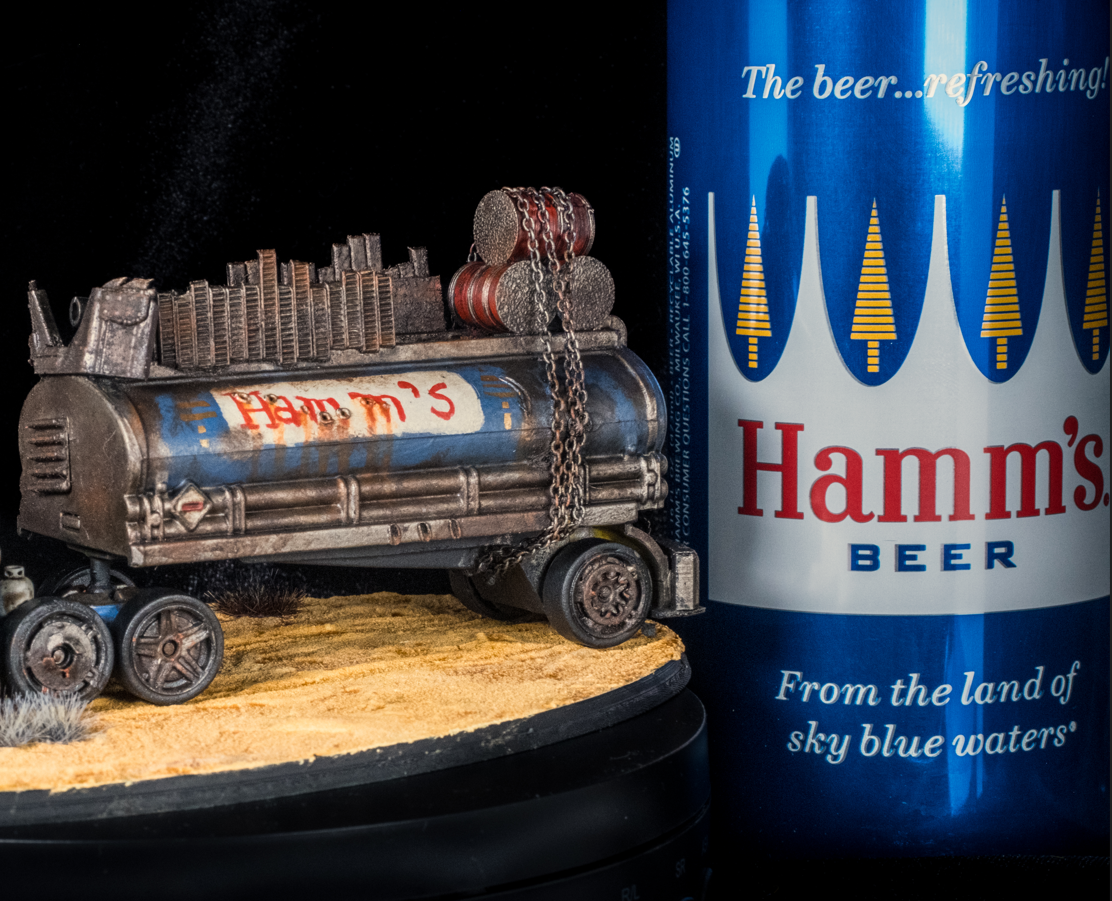
The current headcanon (inspired by by Mark) is this tanker has been repainted many times in its life, resulting in the logo getting a little sloppier each time. The Cult of Hamm’s in the wasteland aren’t known for their artistic abilities.
And now for the weather#
The weathering is always the most fun part of painting something. I have a few go-to processes, but this time around I wanted to do a few new things:
- Oil wash with top level removal (more below)
- Oil pin washing
- Oil rusting
Normally my rust effects in acrylic are sponging AP dry rust then AP fresh rust, which does work well in most cases. Doing a black/brown oil wash (which is my Gaslands go to) over it, and then, here’s the secret, doing that thing where you remove the top payer with a makeup sponge, that’s pretty key. That’s a change I haven’t done before (normally I just do the oil wash because the sponge-off always leaves streaks. Turns out, the secret (to the secret) is to sponge it off in a circle motion. Who knew?).
But then! I got a couple of new oil paint colors specifically for rust, and used them to create a thick oil wash that I dabbed on some locations such as the bullet holes, the metal palisade fencing, and the chains. I wanted it to be much thicker than the normal oil wash, because I wanted to go over it with some pure white spirits and streak it from there.
And honestly? I think it worked really well and it was fun to do. It adds a nice layering over the acrylic level of rust - even with using AP’s Fresh Rust, it gets darkened by the oil wash and looks more weathered and grungy, so the oil rust pops against it nicely (while the acrylics themselves still give a nice texture against pure oil-washed metalic). I think I’m going to be doing that a lot more going forward.
All about the base#
You’ll see in the glamour photos and time lapse a desert themed base, which I created specifically for the photography aspect of my Gaslands builds. In the game of Gaslands, you actually don’t use bases of any kind - it’s more like the 40k rule of “use model” where you measure from the edge of the vehicle itself. But since I shoot my photos on a matte black spinning plate against a matte black velour backdrop, I wanted to create something to give the Gaslands builds a little home to live in; a little diorama effect.
For those of us playing along at home, it’s a 170x109mm oval base, covered in sand texture, washed in Seraphim Sepia, then drybrushed with a bone color to give it a little depth while retaining the look of post-apoc wasteland desert. I also scattered a few dried and dying bushes around the outside. It’s not shown in the time lapse, but I also used a spare Hot Wheels car to drag some “tire tracks” across about 3/4ths of the length for added lived-in-ness.
On theme#
So let’s check our end result.
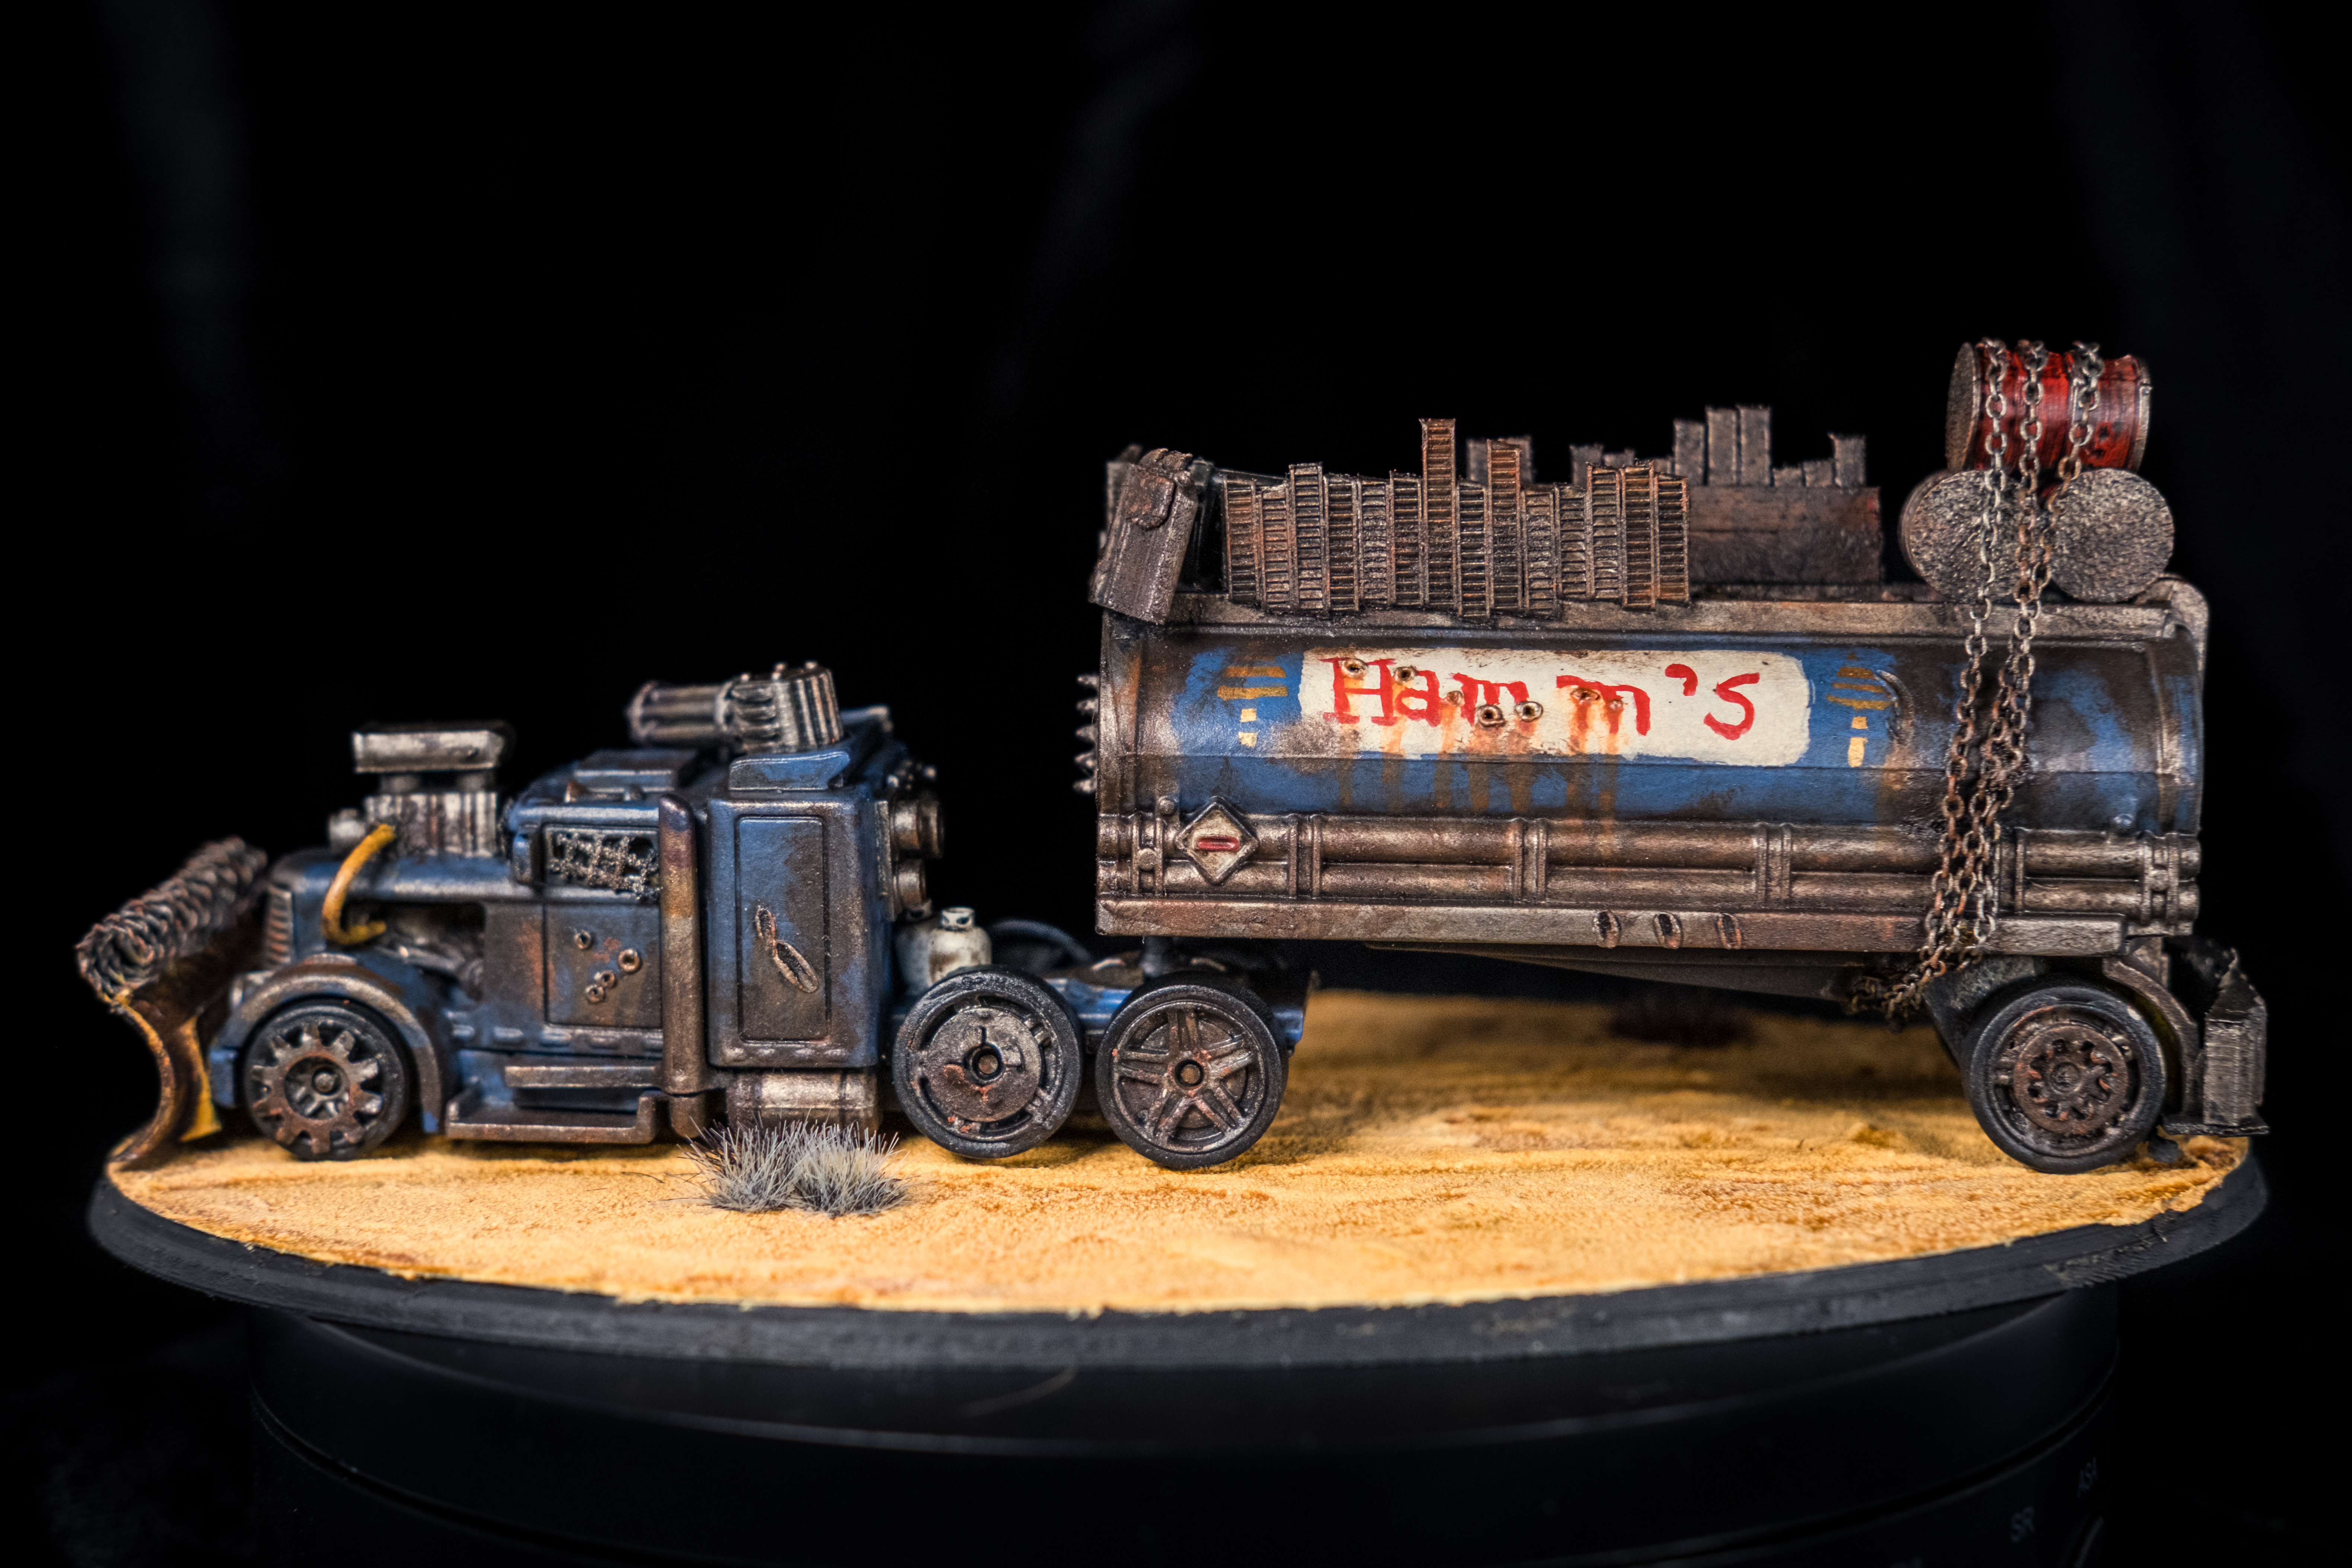
Battle Damage?
Well, we have bullet holes, scrapes, gashes, chips in the plow, bent wheel axels, repaired tanker walls, heat burns on the exhaust, and even leaking holes in the tanker itself.
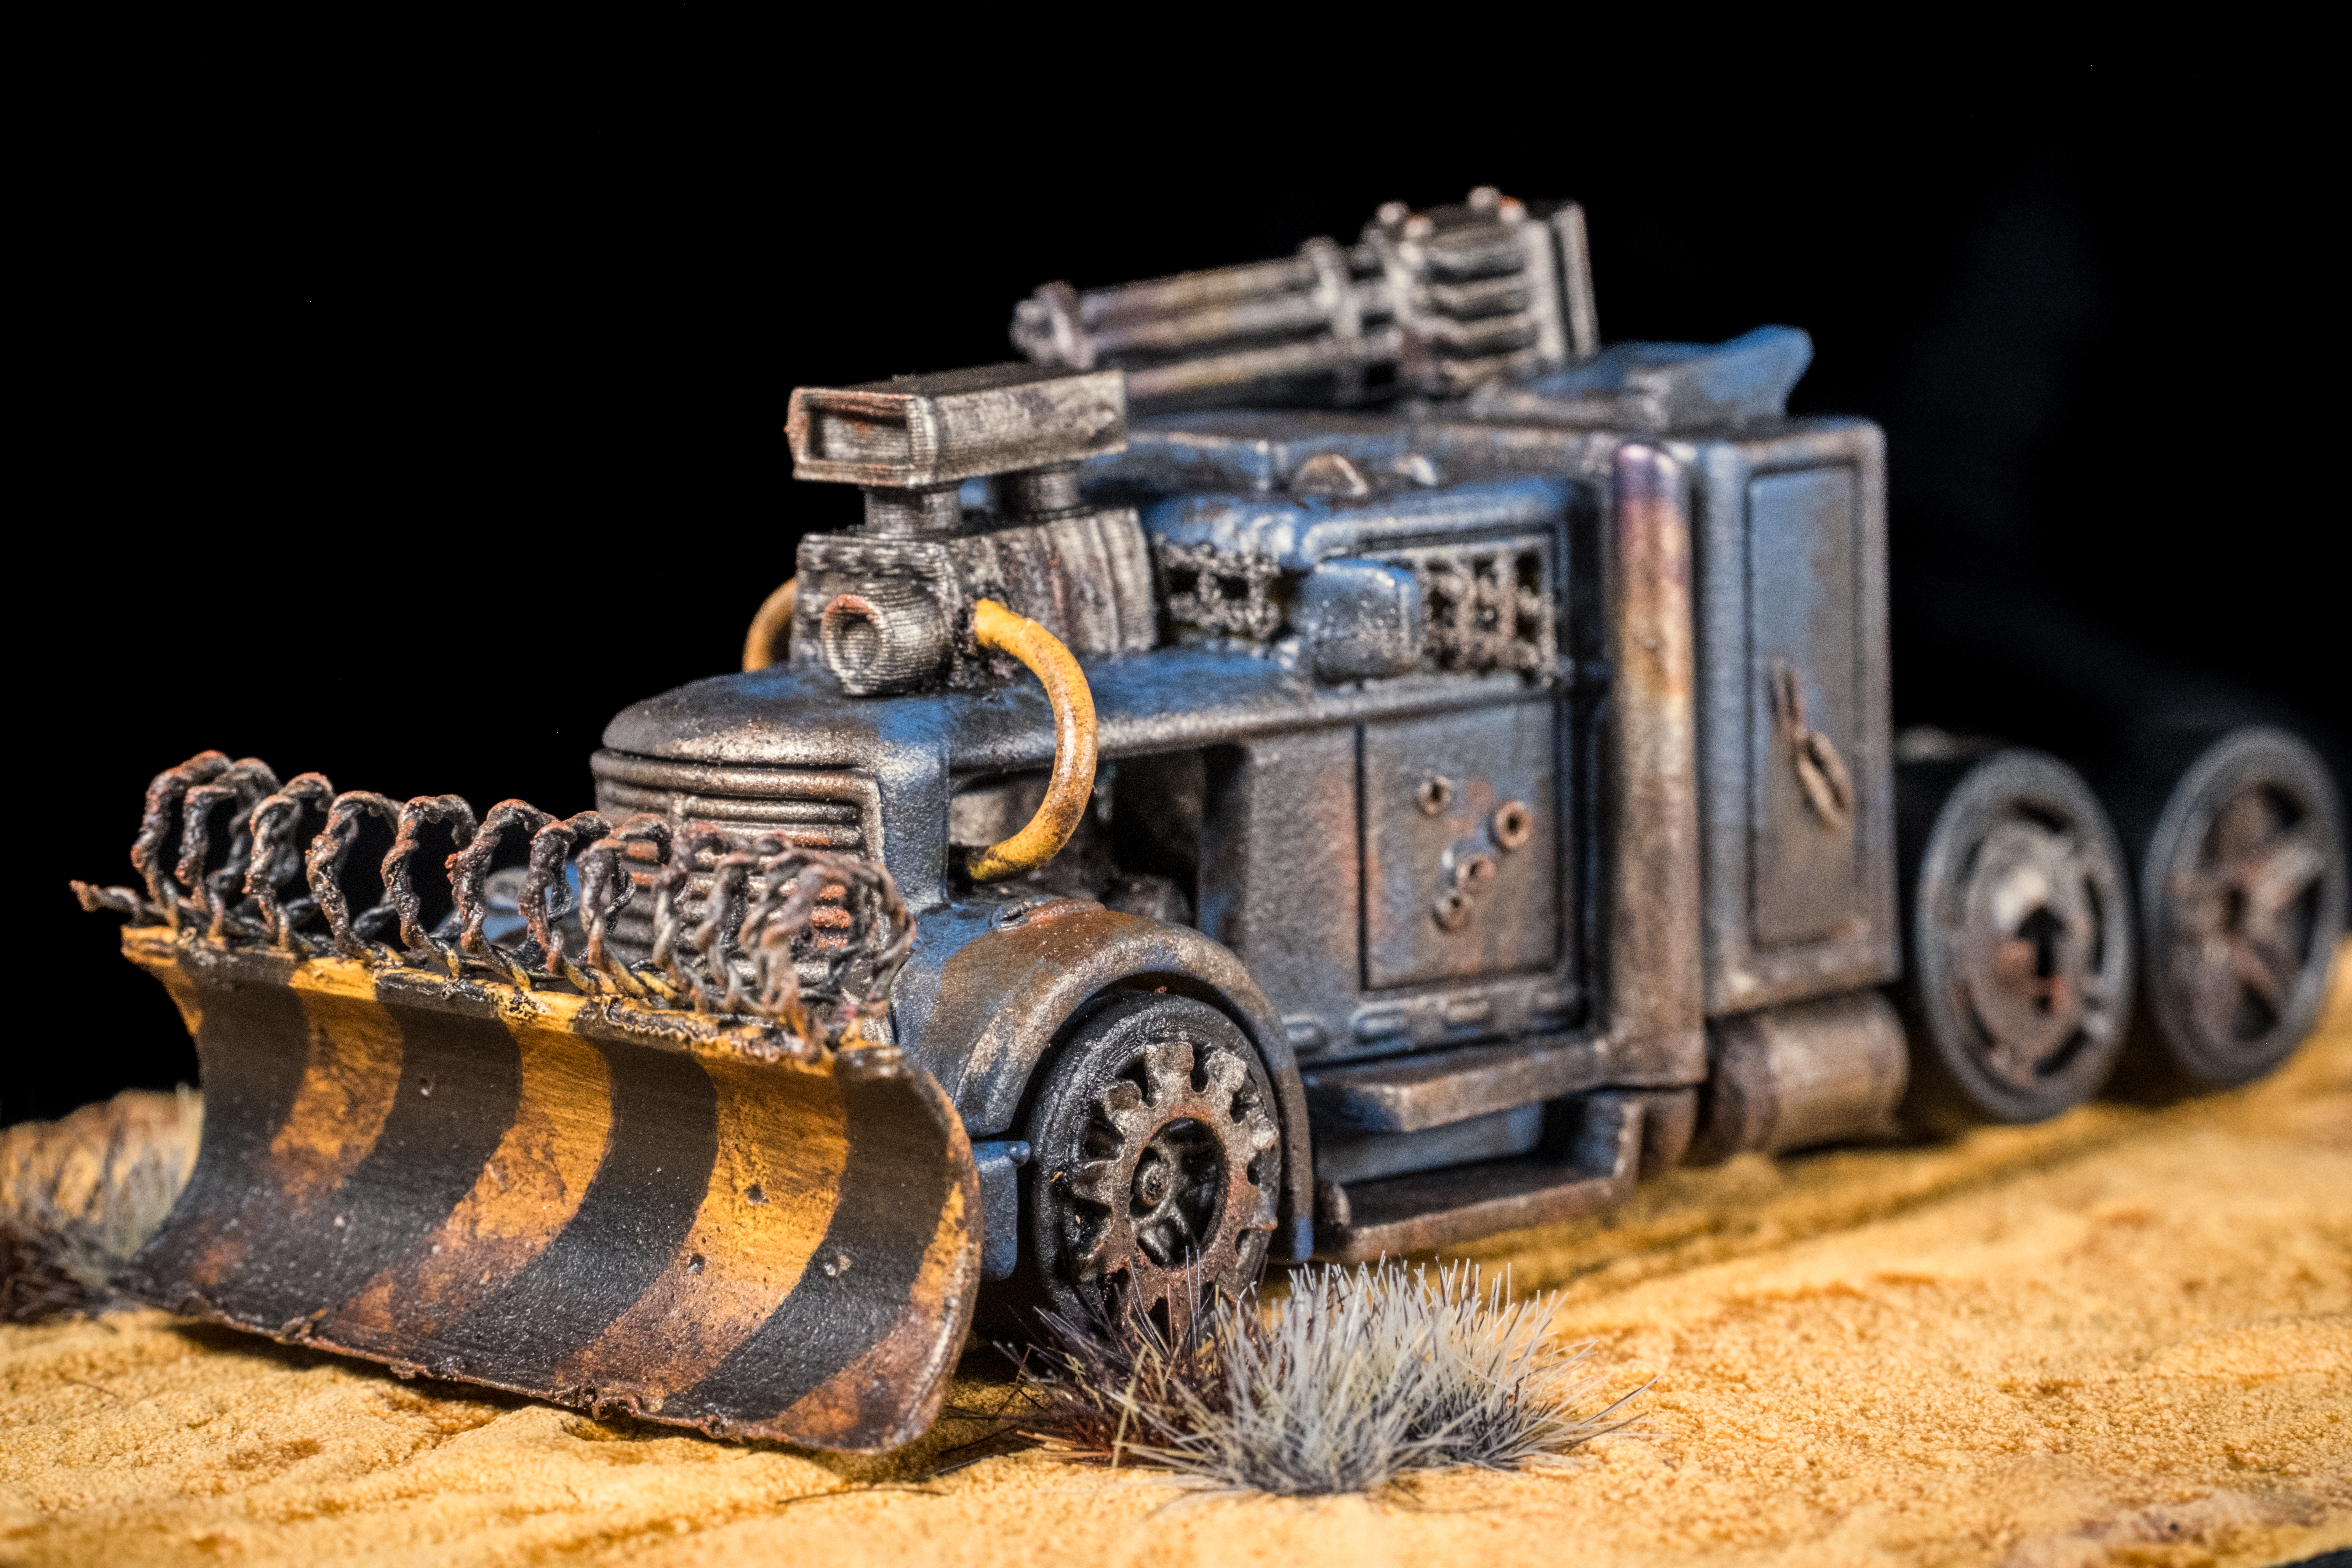
Check.
Weather?
There’s dirt, grime, rust on every surface, corroded metal, and rotting wood. You know if you were to touch this machine it would leave a stain and probably give you lockjaw.
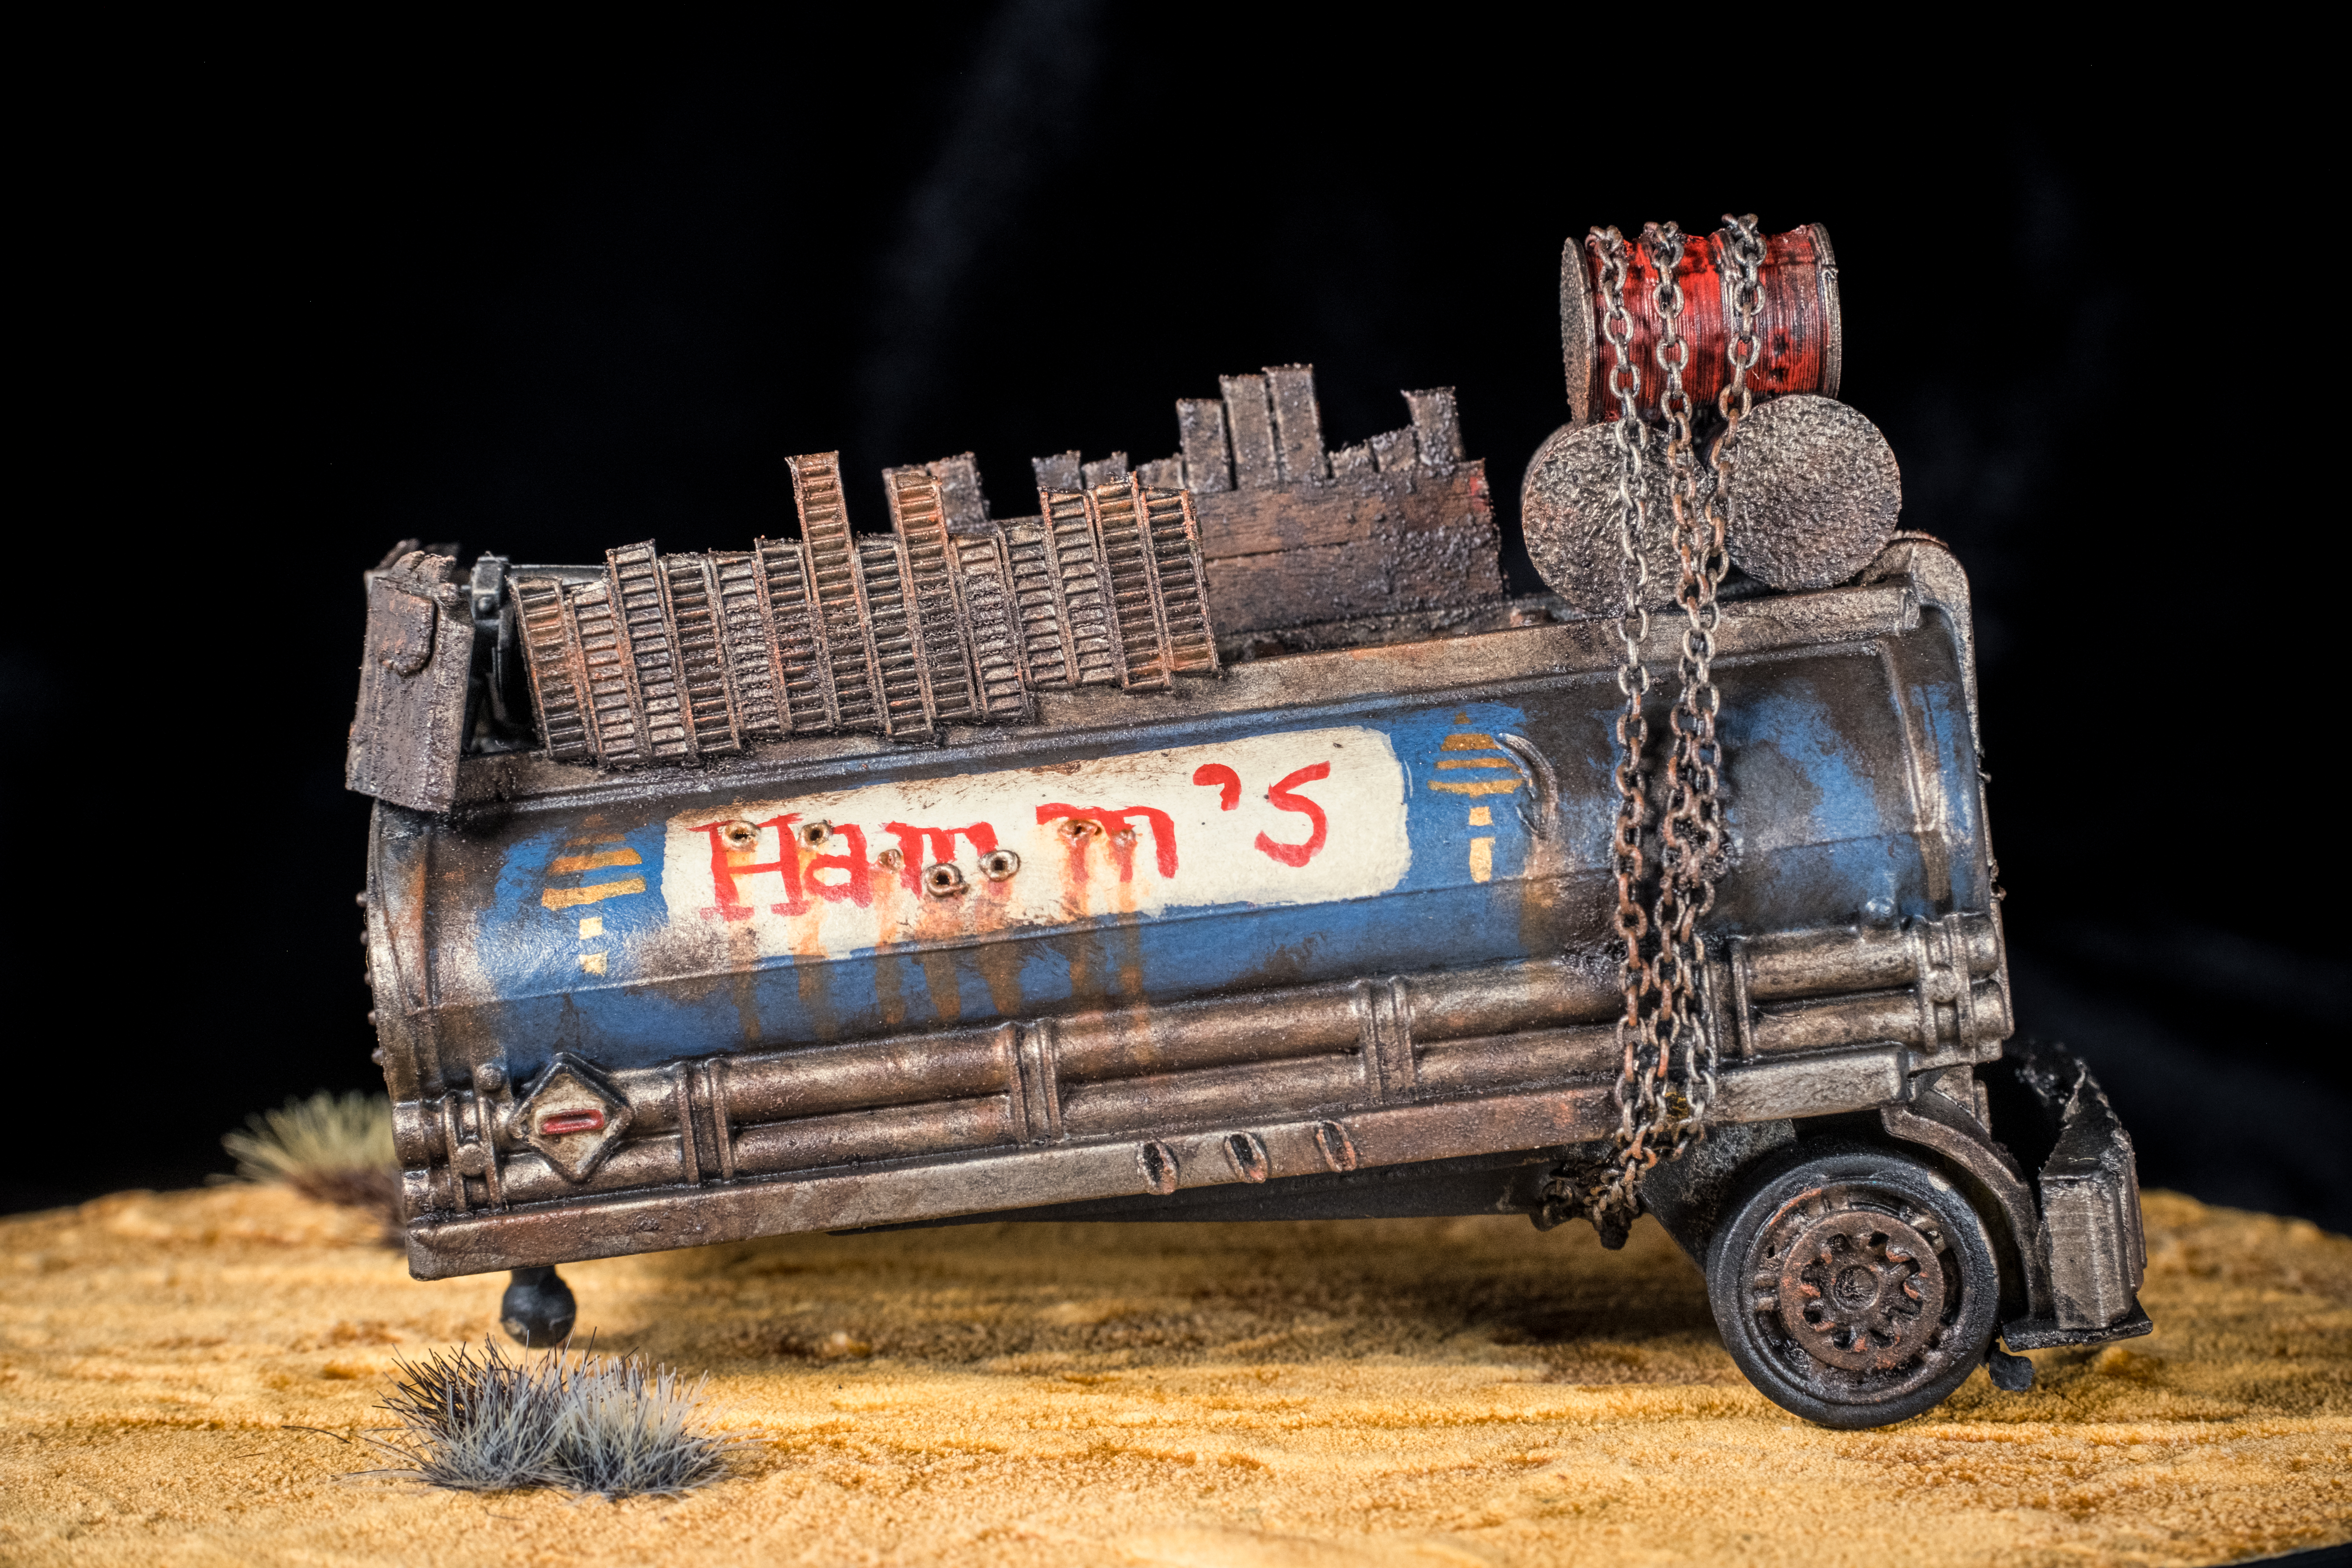
Check.
Veteran?
This truck has been around. It’s seen some shit. Repaired and rigged back into working function due to need and neccesity for the survival of the crew.
And if you want to talk veterans, then certainly you want to mention that Hamm’s Brewery has been around since 1865, meaning by the time this truck is hitting the sand in post apoc Future Earth, it’s reppin’ a 200 plus year-old beer.
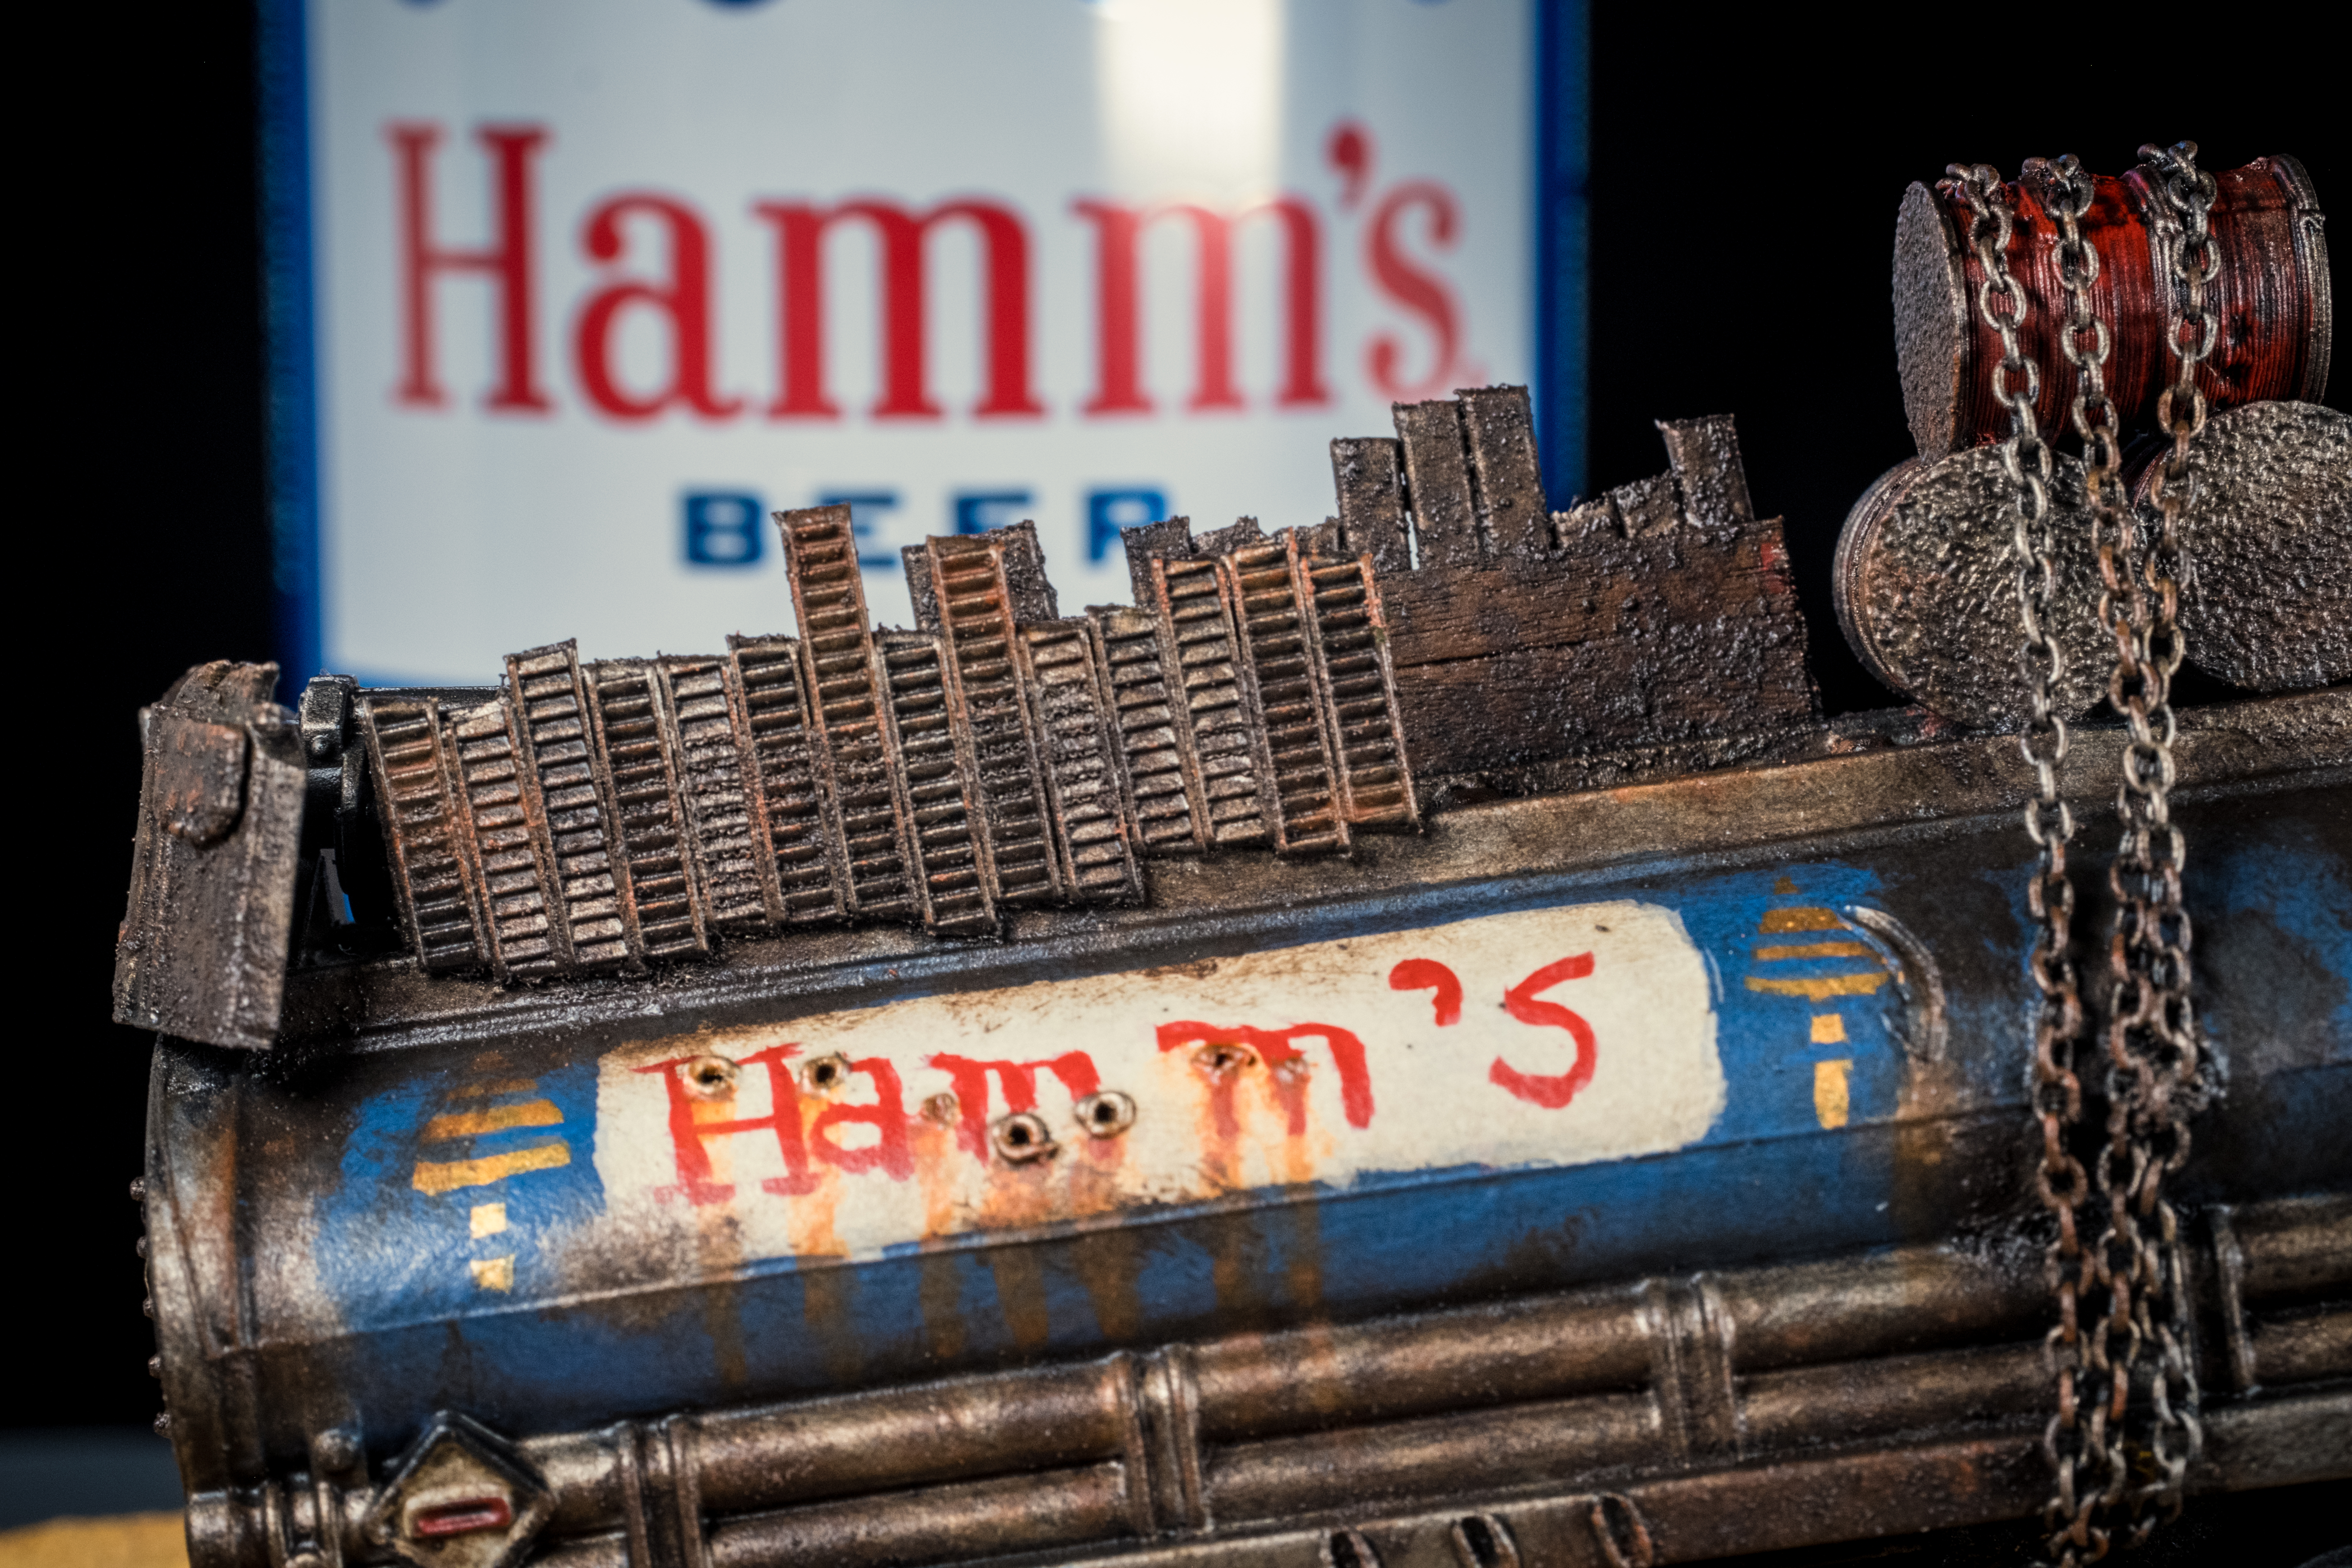
Check.
Double-time#
The afore-mentioned soup to nuts, balls to walls, tip to tail DIY kitbash and painting timelapse video. All told it’s about 7h50m of build and paint time compressed into a half hour PBS episode starring Gary Gaslands and Nigel Lugnut.
Keep on truckin'.
If you want to get ahold of me, you can now reach me at floppyparts@proton.me. Send me whatever you want.
